top of page


Revitalize Your Home: A Guide to Rendering Transformation
1. Surface Inspection
Begin with a thorough assessment of your exterior walls to identify any imperfections, cracks, or uneven surfaces.
2. Surface Preparation
Prepare the walls by cleaning, repairing, and smoothing the surface. This step lays the foundation for a flawless rendering finish.
3. Priming
Apply a high-quality primer to enhance adhesion and create a suitable base for the rendering material.
4. Application of Base Coat
Utilize a specialized base coat, carefully applied to ensure uniform coverage and proper adhesion to the primed surface.
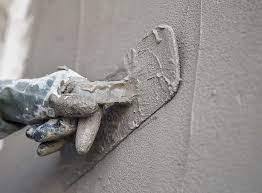
5. Rendering Process
The chosen rendering material, whether traditional or modern, is expertly applied to the external walls. This step involves skilled techniques to achieve the desired texture and finish.
6. Detailing and Design
Incorporate any decorative elements or design preferences during the rendering process to add a personalized touch to your home's exterior.
7. Drying Time
Allow sufficient time for the rendering material to dry and set, ensuring a durable and long-lasting finish.
8. Finishing Coat Application
Apply the final coat for added protection, weather resistance, and an aesthetically pleasing appearance.
Witness the remarkable transformation in our before-and-after showcase, showcasing the incredible impact of external wall rendering on homes. Explore the visual journey of your house's makeover on our website and envision the beauty and durability that awaits your exterior walls. Elevate your home's appeal with our comprehensive external wall rendering services.


bottom of page